Data binding
Data binding is a technique used to synchronize data between the user interface (UI) and data models in applications. It establishes a connection between the UI components and the data, automatically updating and synchronizing the displayed information as the underlying data changes.
Adding data to your component
To enable data binding, your component needs data. But where does it get this data from? In many cases, data is requested from a backend, but sometimes - especially during prototyping - the application provides data itself. But in every case, the key to data binding is the same: component properties (some web frameworks call them "props").
Defining component properties
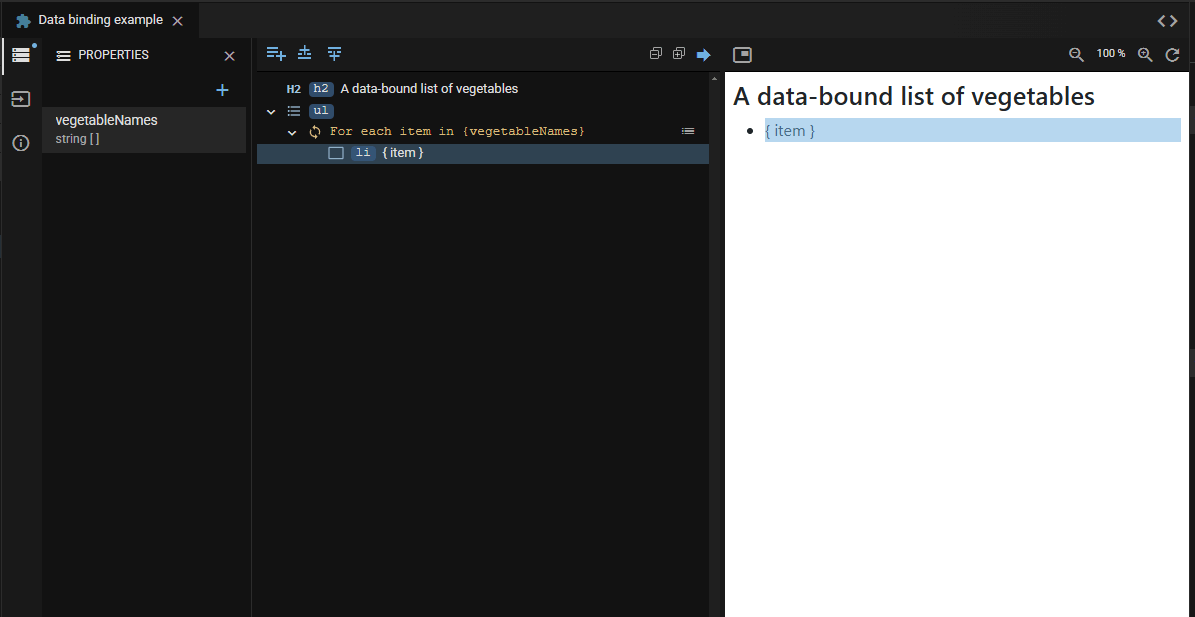
A component property stores the data that must be displayed by the component template. Among other things, it defines what the type of data is and where it comes from. You can access component properties on the left side of the template editor. In the following example, you see a “vegetableNames” property with the data type string. The [] notation indicates that it is a collection.

Start creating a new component property by clicking the plus-icon in the properties list. At the very minimum, you need to define the property name and type.
JitBlox supports several primitive data types such as boolean and string. Often you will also want to create your own more complex data types such as Customer or Order. You can do this in the data model.
Binding to data
So, how is the binding created as shown in the example above? Let's take a step back and start with a list item that has a static text value. And let's also assume that the For each logic has already been added to the template (more on that below).
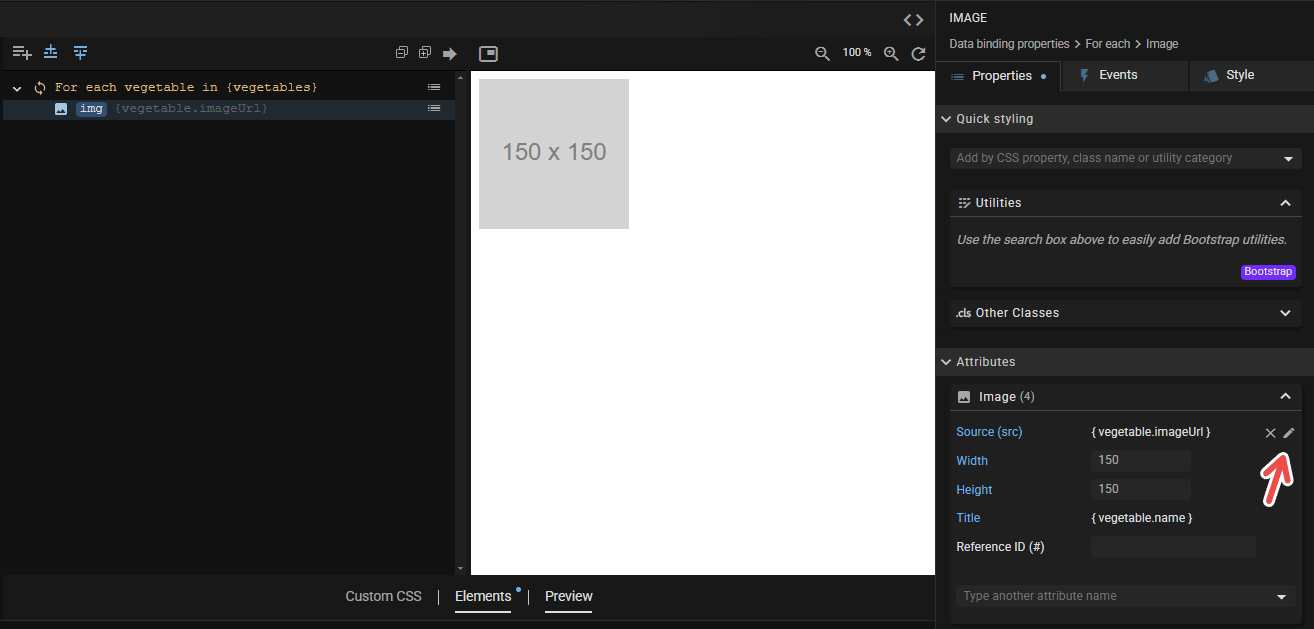
In addition to binding the text of an element to data, you can also do so with attributes. For example, consider the src attribute of an image, which you bind to the URL of an image - which is typically provided by a backend system (the red arrow points to the advanced property that allows you to configure the binding):

This is all. Well, except for one thing: where does the data come from?
Setting a data source
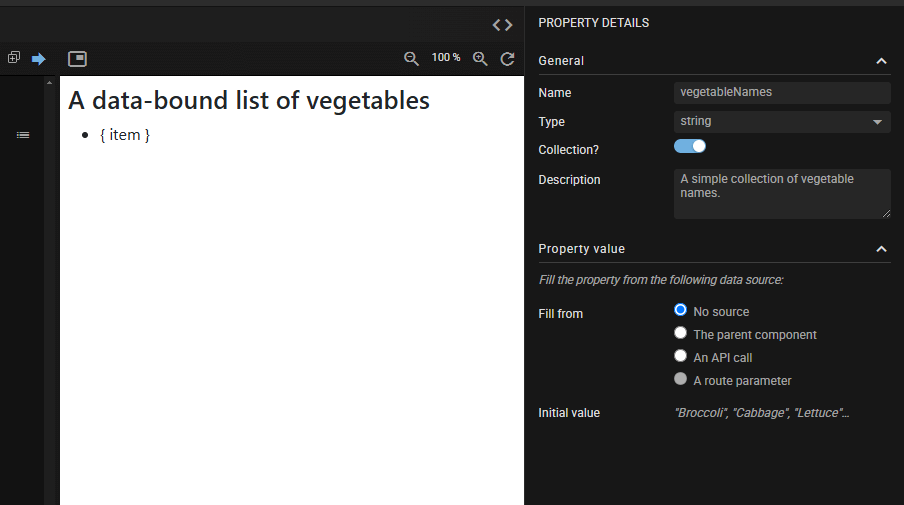
When you click a component property, the property details pane provides you with multiple ways for filling the property with data:
- Let a parent component provide the data. With this option, the property becomes an input that can be set from another component that contains an instance of this component.
- Fill the property from an API-call. For this, you will need to create an API-Stub with an operation that matches the type of the component property. If the API call requires parameters, you can fill these with default values, or you can fill them dynamically from a route parameter.
- Fill the property directly from a route parameter. You can do this only if the property has a primitive type such as string, number or boolean. Read more about route parameters in the routing section.
Choosing a data source is optional: you can simply give the property only an initial value, as in the example in this section. This is actually the most straightforward way to use mock data in your component (if you want more flexibility, check out the section on API stubs). You can set initial data for simple as well as for complex data types.

Adding logic
JitBlox supports two types of logic that are data-driven: the For each and the If-condition. Both can be found in the Structural category of the toolbox.
Inserting a For each loop
The For each loop repeats its contained element(s) for each item in a collection. This is how you would insert the loop from the vegetableNames example above:
The For each construct is well-known to developers who are familiar with front-end frameworks (for example the *ngFor directive in Angular, or the v-repeat directive in Vue.js). In JitBlox, you won't need to set these directive on an element directly, but instead you enclose one or more elements in a For each.
Inserting an If-condition
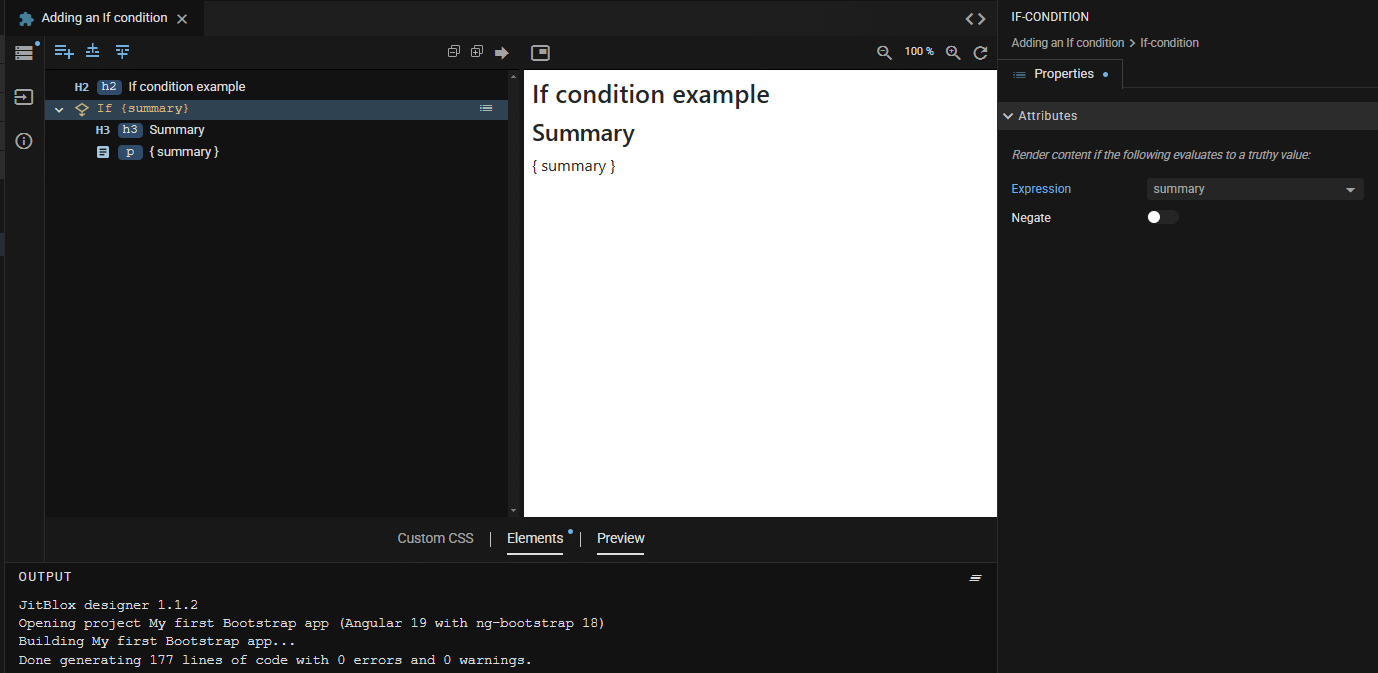
The If-condition causes the content to appear only if a specified value is true or false. Inserting one works similar to inserting a For each. When inserted, it looks as follows:

You might have expected an If condition to work only with boolean values that are true or false. It doesn't have to, because what matters is whether the expression evaluates to a so-called true thruthy value according to JavaScript rules.
Inserting data-bound content
When you insert a widget, you can also bind it to data directly from the toolbox, this may even include a For each loop. This can be a huge time saver! The following example adds an HTML list, including bindings, all at once.
